Interior Design / eDesign Training.
Photoshop is awesome. It can be used for so many things inside an interior design business. But what we use it for the most inside our business is building individual rooms with Photoshop templates and placing product images into it from all over the internet. Now, why take product images from 2D to 3D with Photoshop?
Our clients love this because they can get a lower price for a single room vs paying premium price for a 3D room.
The biggest advantage of using Photoshop for eDesign is that you can source product images from anywhere or any vendor on the internet. The downside is that the product images we find are not normally in the correct perspective and often times will need to be modified to in order to be placed in a 3D room.
This tutorial is going to show you how to do that.
Let’s learn how to take product images from 2D to 3D with Photoshop.
Before you get started, make sure to download the project files below so you can follow along during the tutorial !
Click here to join Photoshop Launch. A FREE crash course in learning Photoshop for Interior Design.
Today’s Lesson:
Take Your Product Images from 2D to 3D with Photoshop.
eDesign training for Interior Designers
Hey guys welcome back so today we’re going to be looking at how to take a 2d product image and manipulate it so that it appears to be 3D.
Since you’re watching this tutorial you’re probably and eDesigner, interior designer decorator or virtual stager in a situation where you may know a little bit about Photoshop and you’re able to bring in these product images from all over the Internet and bring them into Photoshop and place them, but you might be running into the problem that you can’t really place them in three-dimensional space within whatever space you’re you’re designing.
So today we’re going to be looking at how to actually take that 2d image and basically give it a new perspective so that it’s in a 3D space and looks realistic.
All right so before you get started today make sure to download the project files, located below this video. So go ahead and download those and I’ll see you inside
Time to open up your project files and let’s get started remember your file isn’t going to look exactly like the one we’re using here we cleaned it up a lot.
Step One: Front face
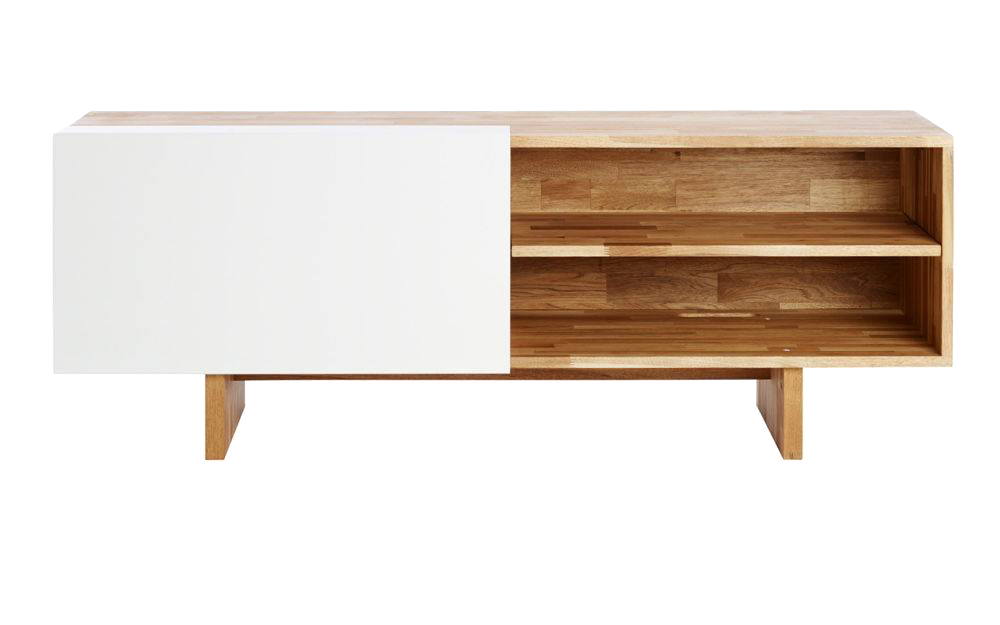
Step one we are going to need to pull up the Marquee tool (M) and then what we want to do is start segmenting out this media stand, AKA we’re going to cut it into some pieces that we can put into perspective.

- Let’s start by grabbing the front face with the marquee tool. Note: make sure you have the correct layer selected.
- Put that face on its own layer (CMD J).
- Now, let’s put that front face in perspective.

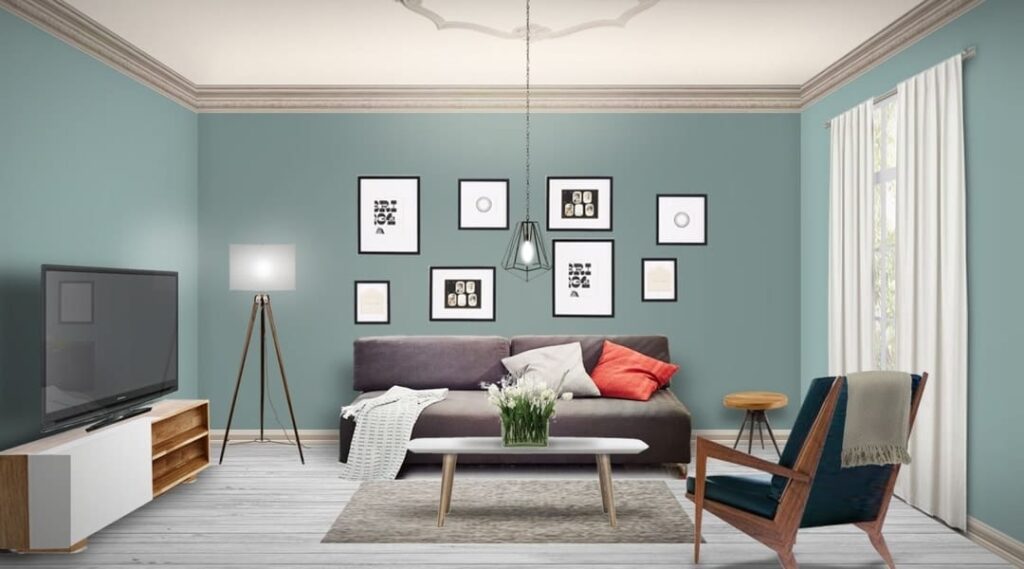
With the transform tool engaged, Ill Drag it over to the side of the room and give it some space to sit slightly away front the wall. Factoring in the depth of the media stand. I think it should be about this far into the room. I’ll right click choose perspective and scale it own.

Make sure it’s lined with the perspective lines, so it’s looking pretty good I think it might be a little bit tall, so I’m going to scale it down again using the free transform tool. A great tool for eDesign.
See how it stayed in the correct perspective? Let’s take a look and see how that looks compared to original it’s looking pretty cool
Step Two: The Side of the media stand
We are going to make the left side of the media stand by sourcing from the original image.

All right I’m going to just guess that half the side of this is plastic and White and the other half is wood. I’m going to make a small selection of the white area hit command or control J to put it on its own layer and then I’m drag that over control or command T and just stretch out.
All right, I want to make sure that this is lateral and that it is meeting up with my bottom Edge.

We completed the white side of the panel now or let’s make up a wooden section using the same eDesign method.
So ill take this wooden section and actually flip this upside down drag it send it back just to touch. At this point I’m just going to have to guess on how deep this goes I think that looks approximately correct make sure that these bottoms lined up cool so that’s our side in our front.

Step 3: the top of the media stand
now I just want to get this top section in there and again I think we’ll just Source from the original by grabbing that top with the marquee tool
Command or control J.
Now Line the left edge up so it’s going to take a little bit of squashing and stretching. This time I put my Anchor Point right on the corner. I’ll hold alt click where I want the point and lock into place.

Step 4: The Legs of the media stand
I’m going to straighten out my bottom again and add some legs. If we look at the original we have these little legs down there we can try to mimic.
Again by just grabbing or sourcing from the original with the marquee tool and hitting cmd or control J we can gt the legs on their own layer and then can just go in and stretch it out. then duplicate it for the second leg of the media stand. This works really well for eDesign because it’s fast.
Respond back here I’m just kind of line it up, so I think I’m pretty happy with that now it does look like the top Edge is a little bit off.

I hope you enjoy that hopefully at this point I kind of know how to go from anywhere online grab some 3D images bring them into Photoshop and reposition them to kind of look more realistic getting them that the little extra expertise in your business.
If you want to learn more or if you’re kind of struggling with the basics or even the advanced stuff and you want to go to a little bit further check out Photoshop Launch below.
Thank you for joining me for another exciting lesson here in Photoshop and I’ll see you next time!